Using my own Twitter API key with Tweet Hunter (and get 1 month free)
How to get and configure your own Twitter API key to be used with Tweet Hunter.
We sometimes face issues with the Twitter API. Using your own Twitter API key with Tweet Hunter is the best way to make sure you increase the limits of your account and bypass some of the problems Twitter can cause.
It may seem a bit technical, but it’s actually really easy if you follow all the steps below.
So let’s get started!
1. Creating a Twitter Developer account
The first step of this process is creating a Twitter Developer account (if you don’t already have one). You can do so by heading over to the Twitter Developer platform and creating a free account.
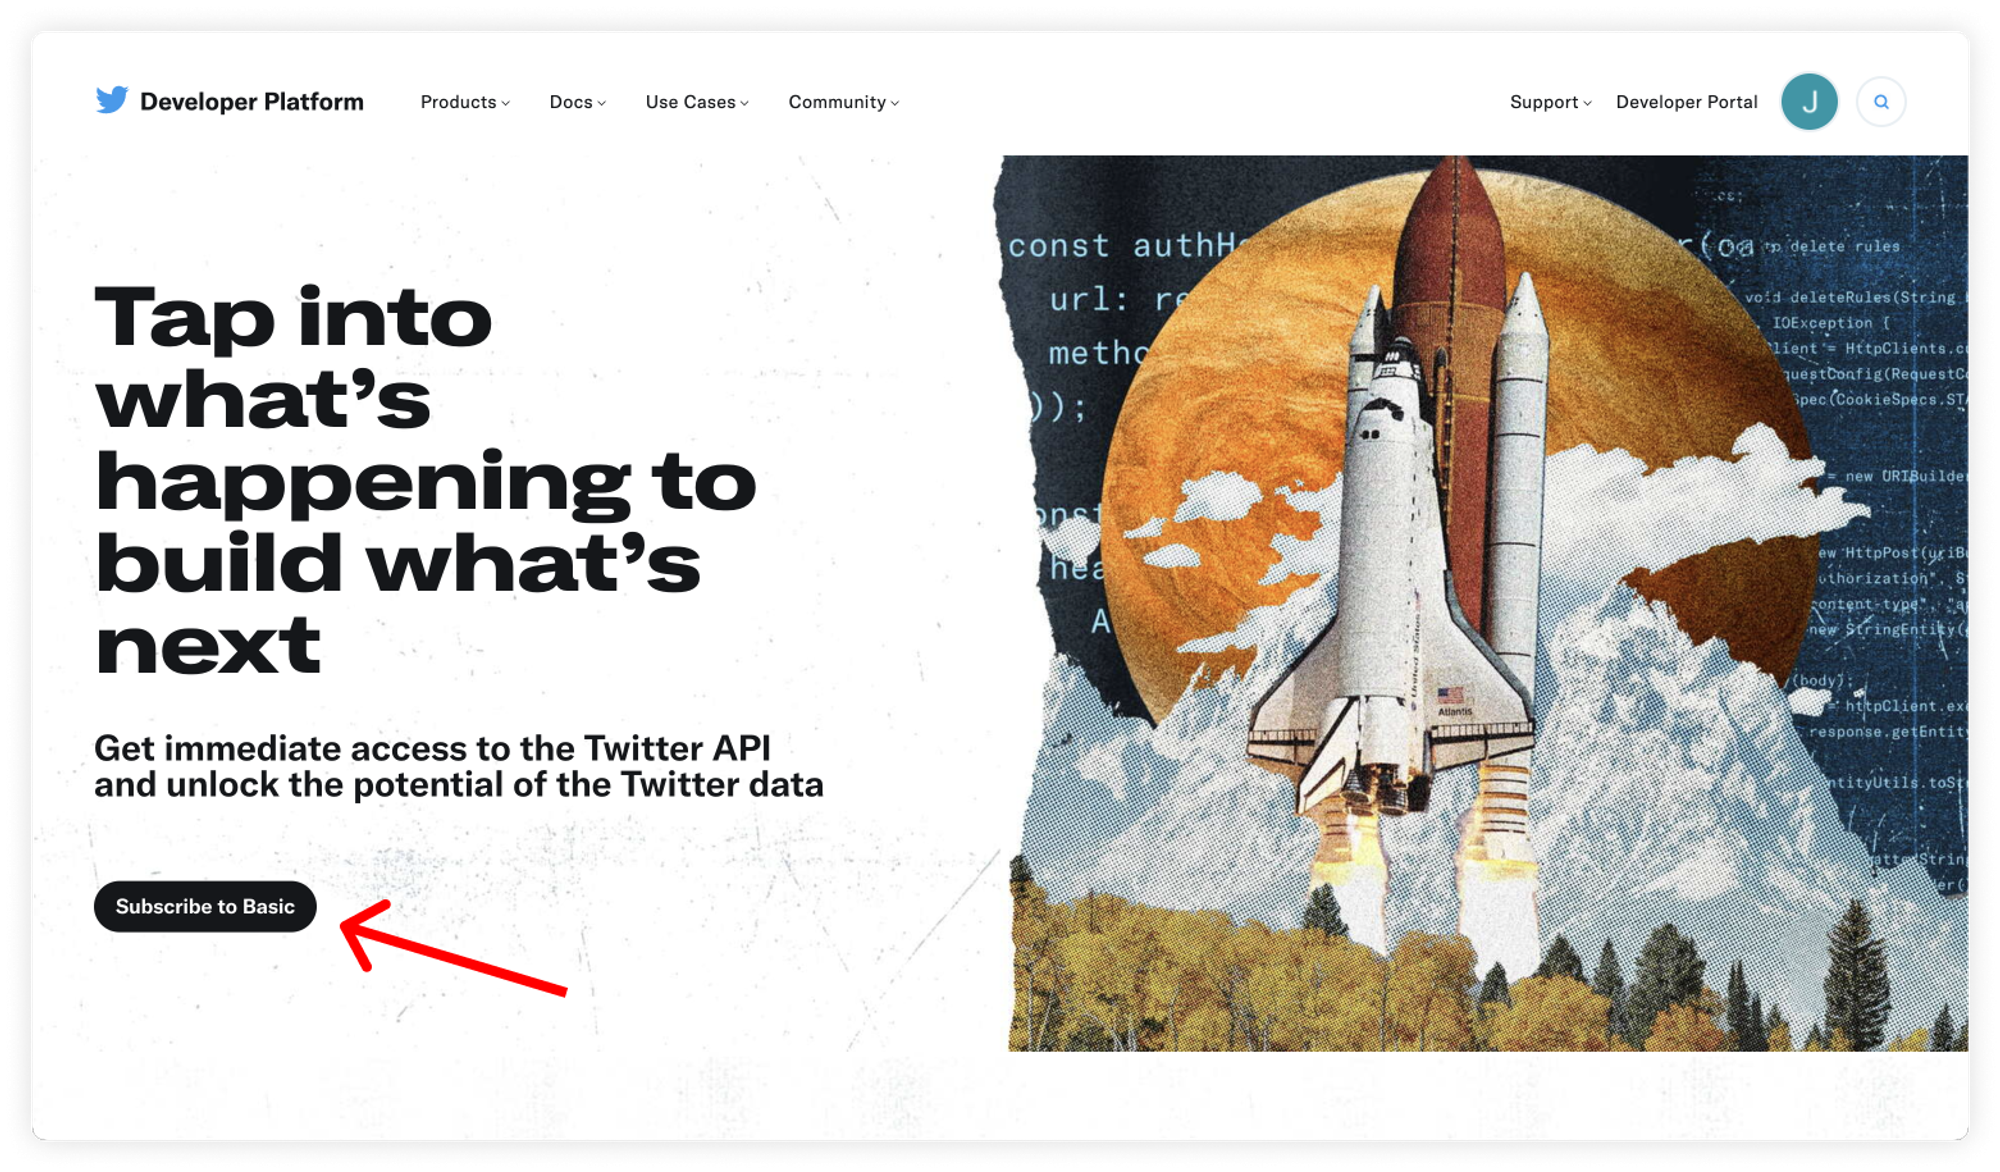
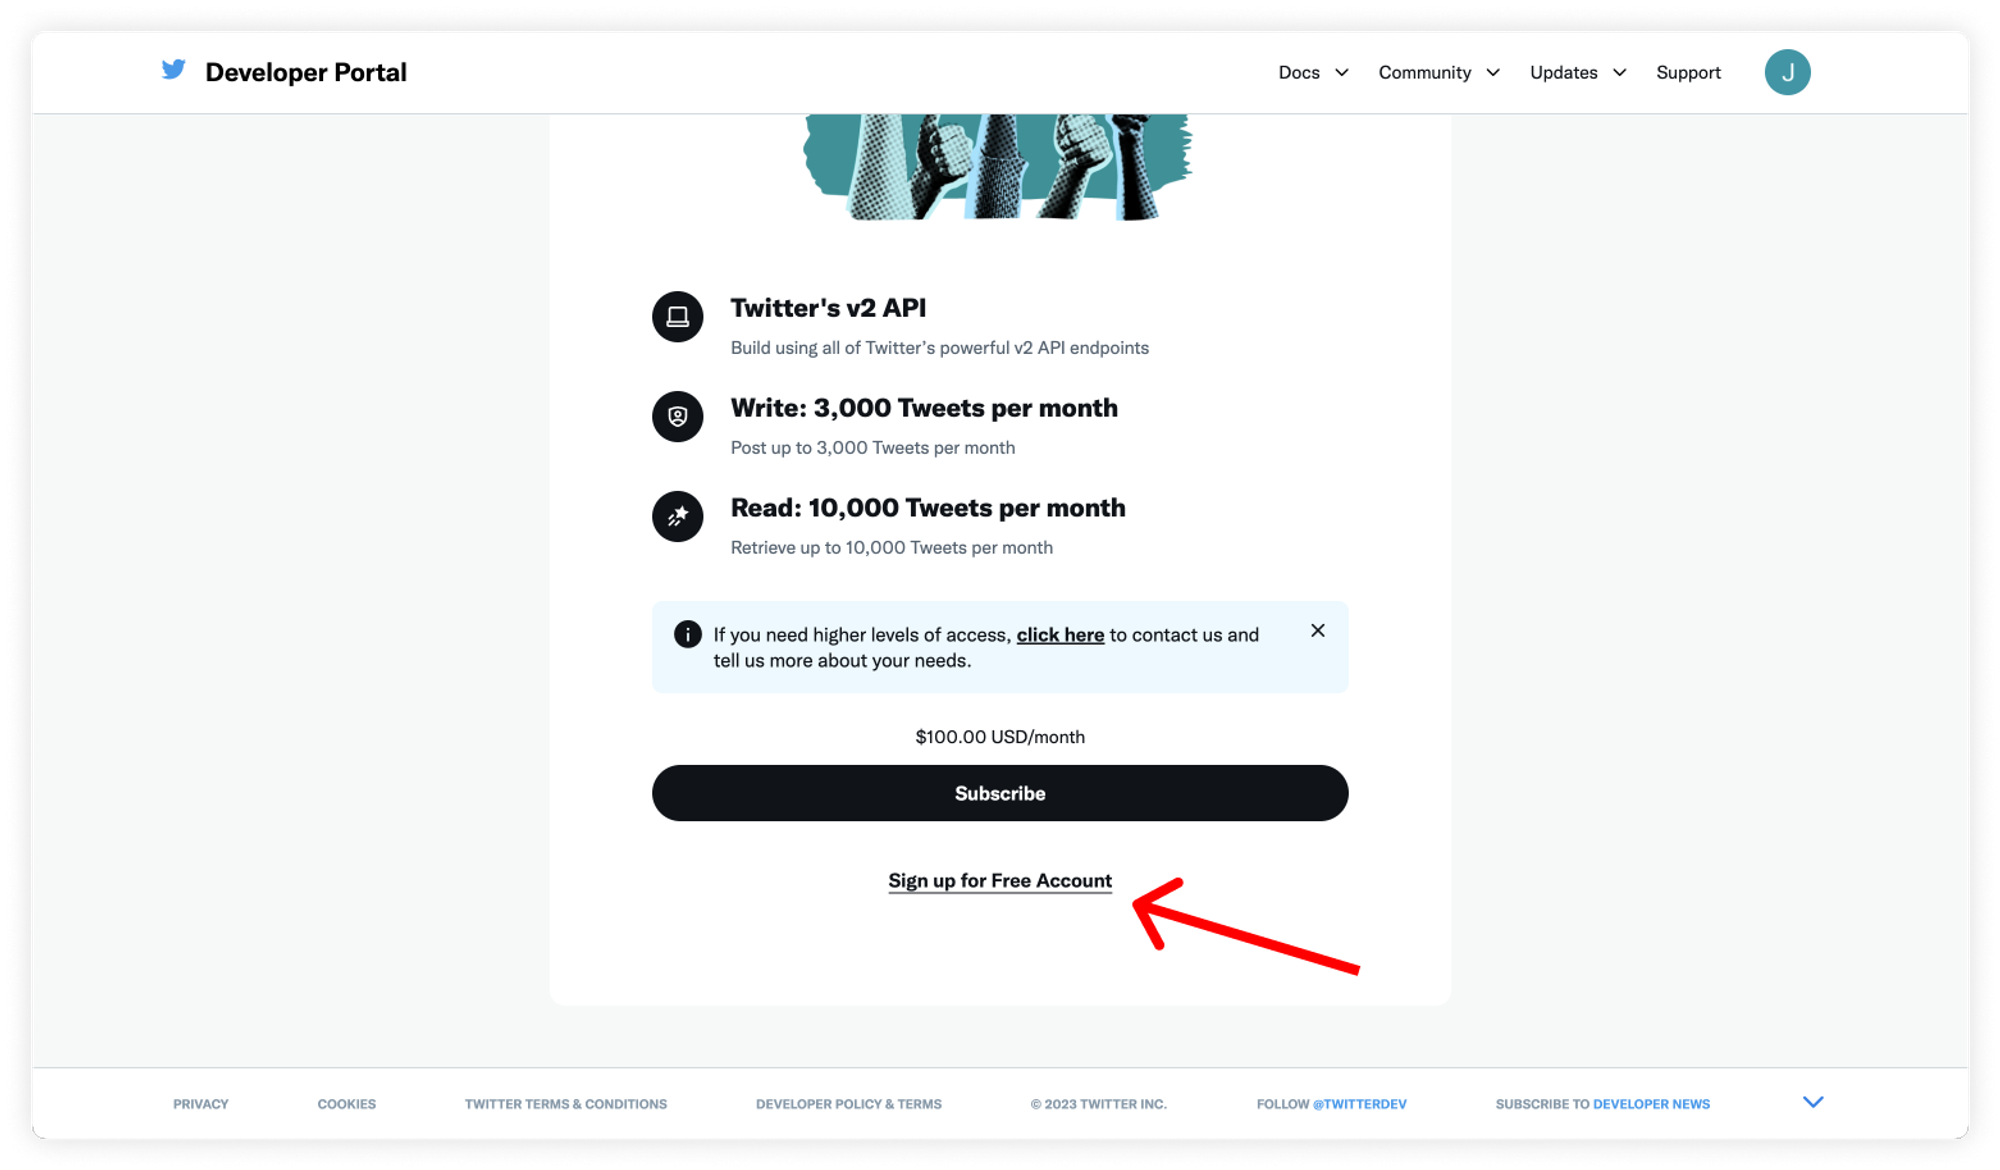
Once you’re there, hit the “Subscribe to Basic” button and select “Sign up for a Free Account”.
At this stage, Twitter might ask you to confirm your phone number to make sure you are a real person.
Once your account is created, Twitter will ask you to agree to its developer policy.
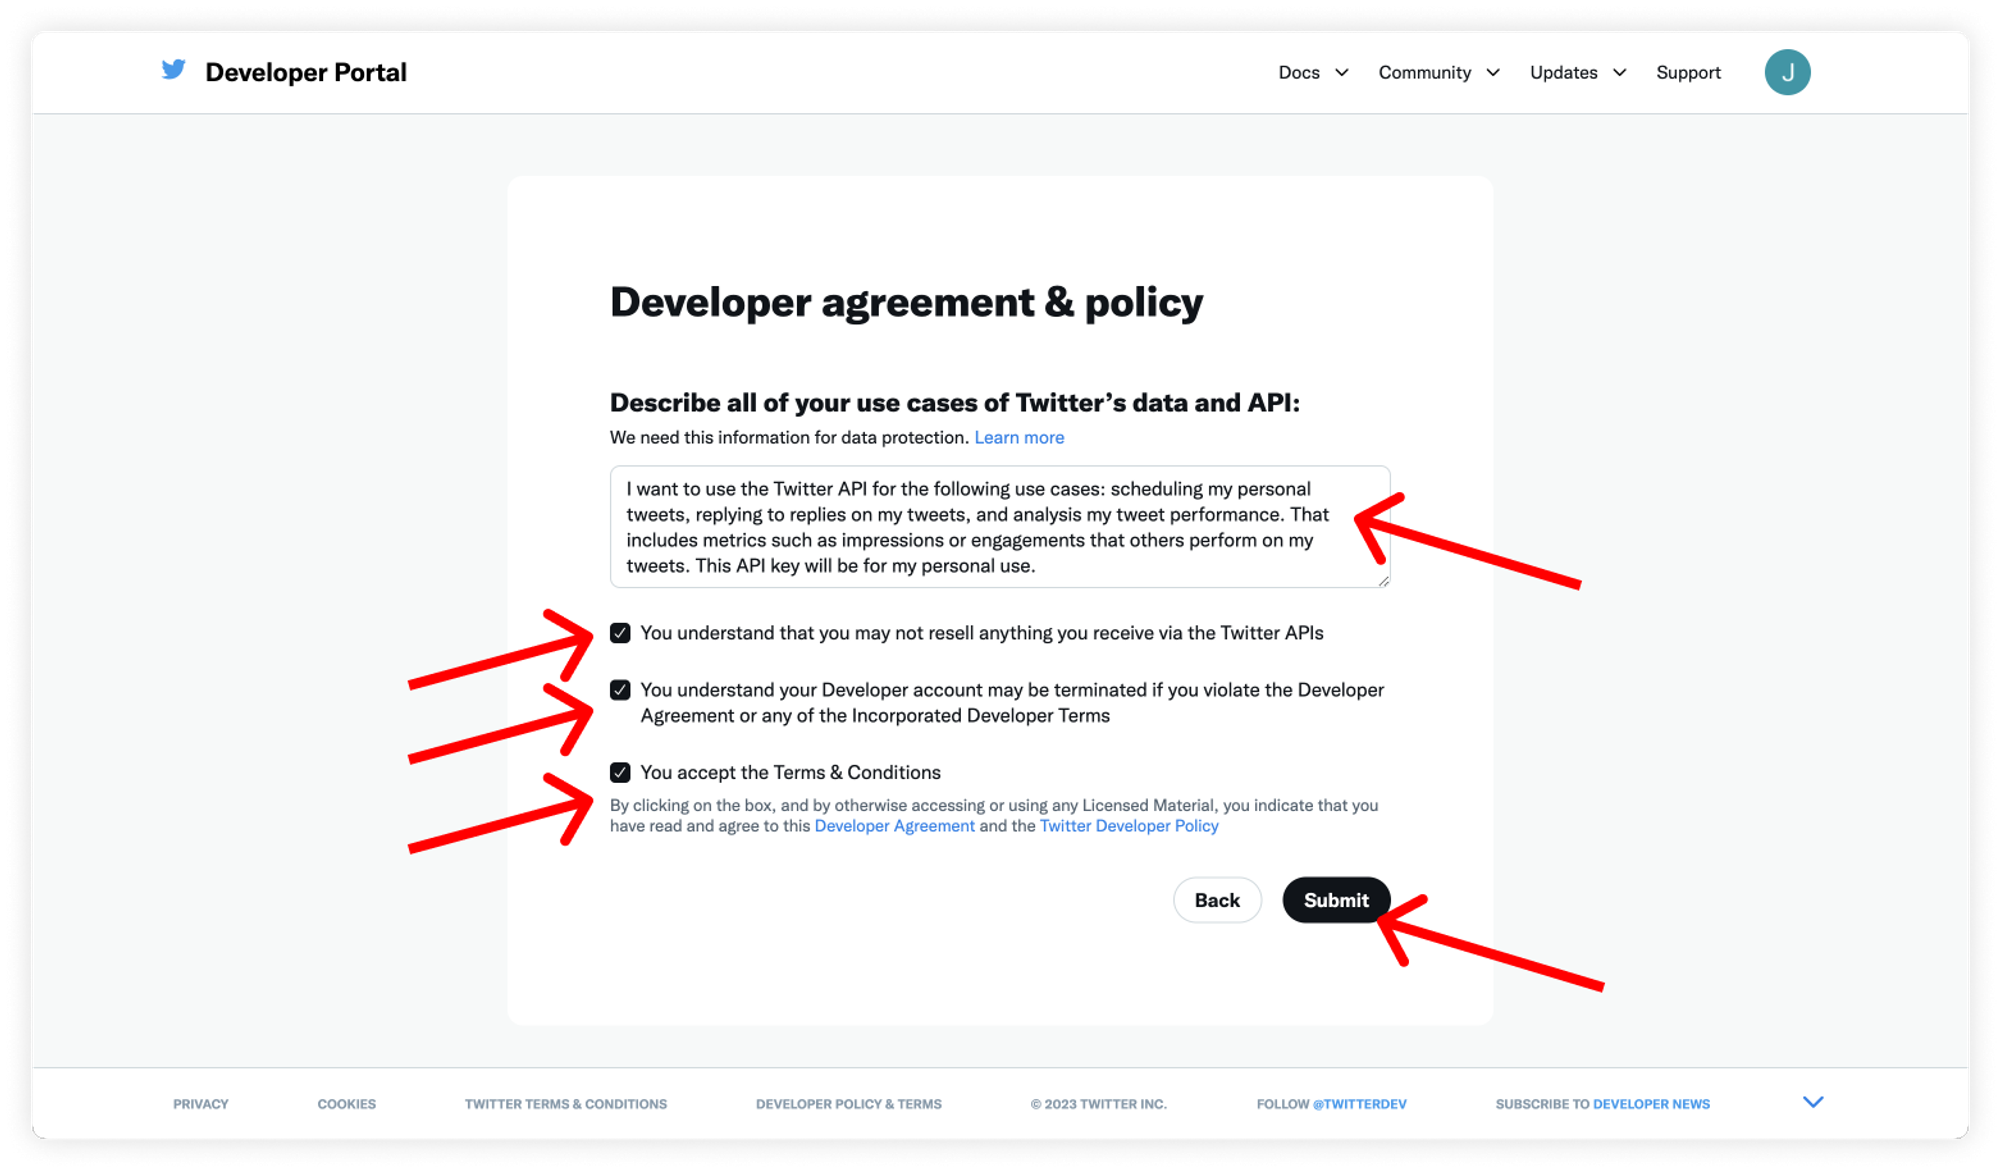
For the description of your use case, you may use something along the lines of:
I want to use the Twitter API for the following use cases: scheduling my personal tweets, replying to replies on my tweets, and analysis my tweet performance. That includes metrics such as impressions or engagements that others perform on my tweets. This API key will be for my personal use.
We suggest you write your own description by taking inspiration from this one.
Usually, you are automatically approved for this. Once you’re done with this step, you’ll access your Twitter Developer account.
2. Creating an app and API key
This is the space where you’ll arrive after creating your Developer account.
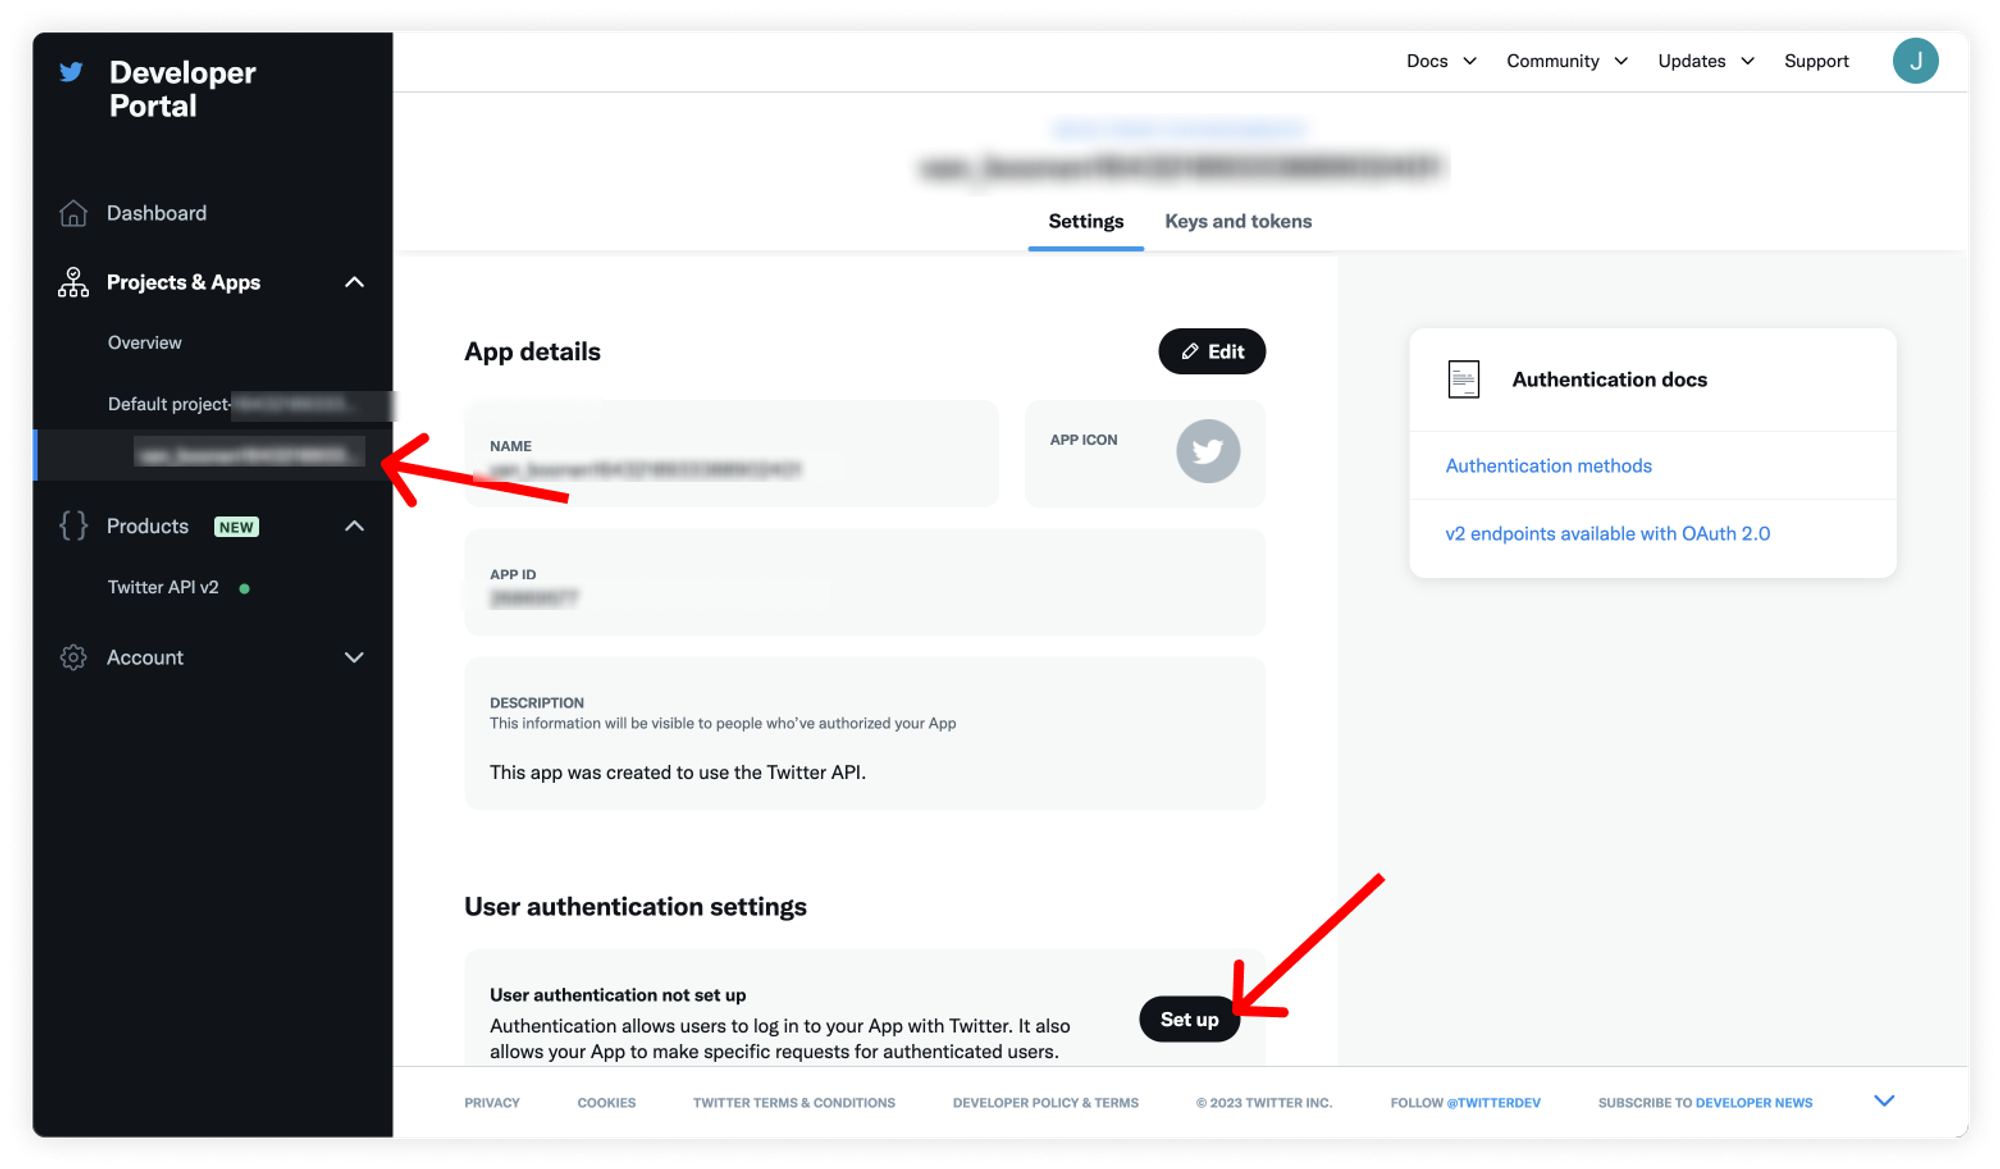
Navigate to “Projects & Apps” and select the default project that was created for you automatically by Twitter.
Then hit the “Set up” button.
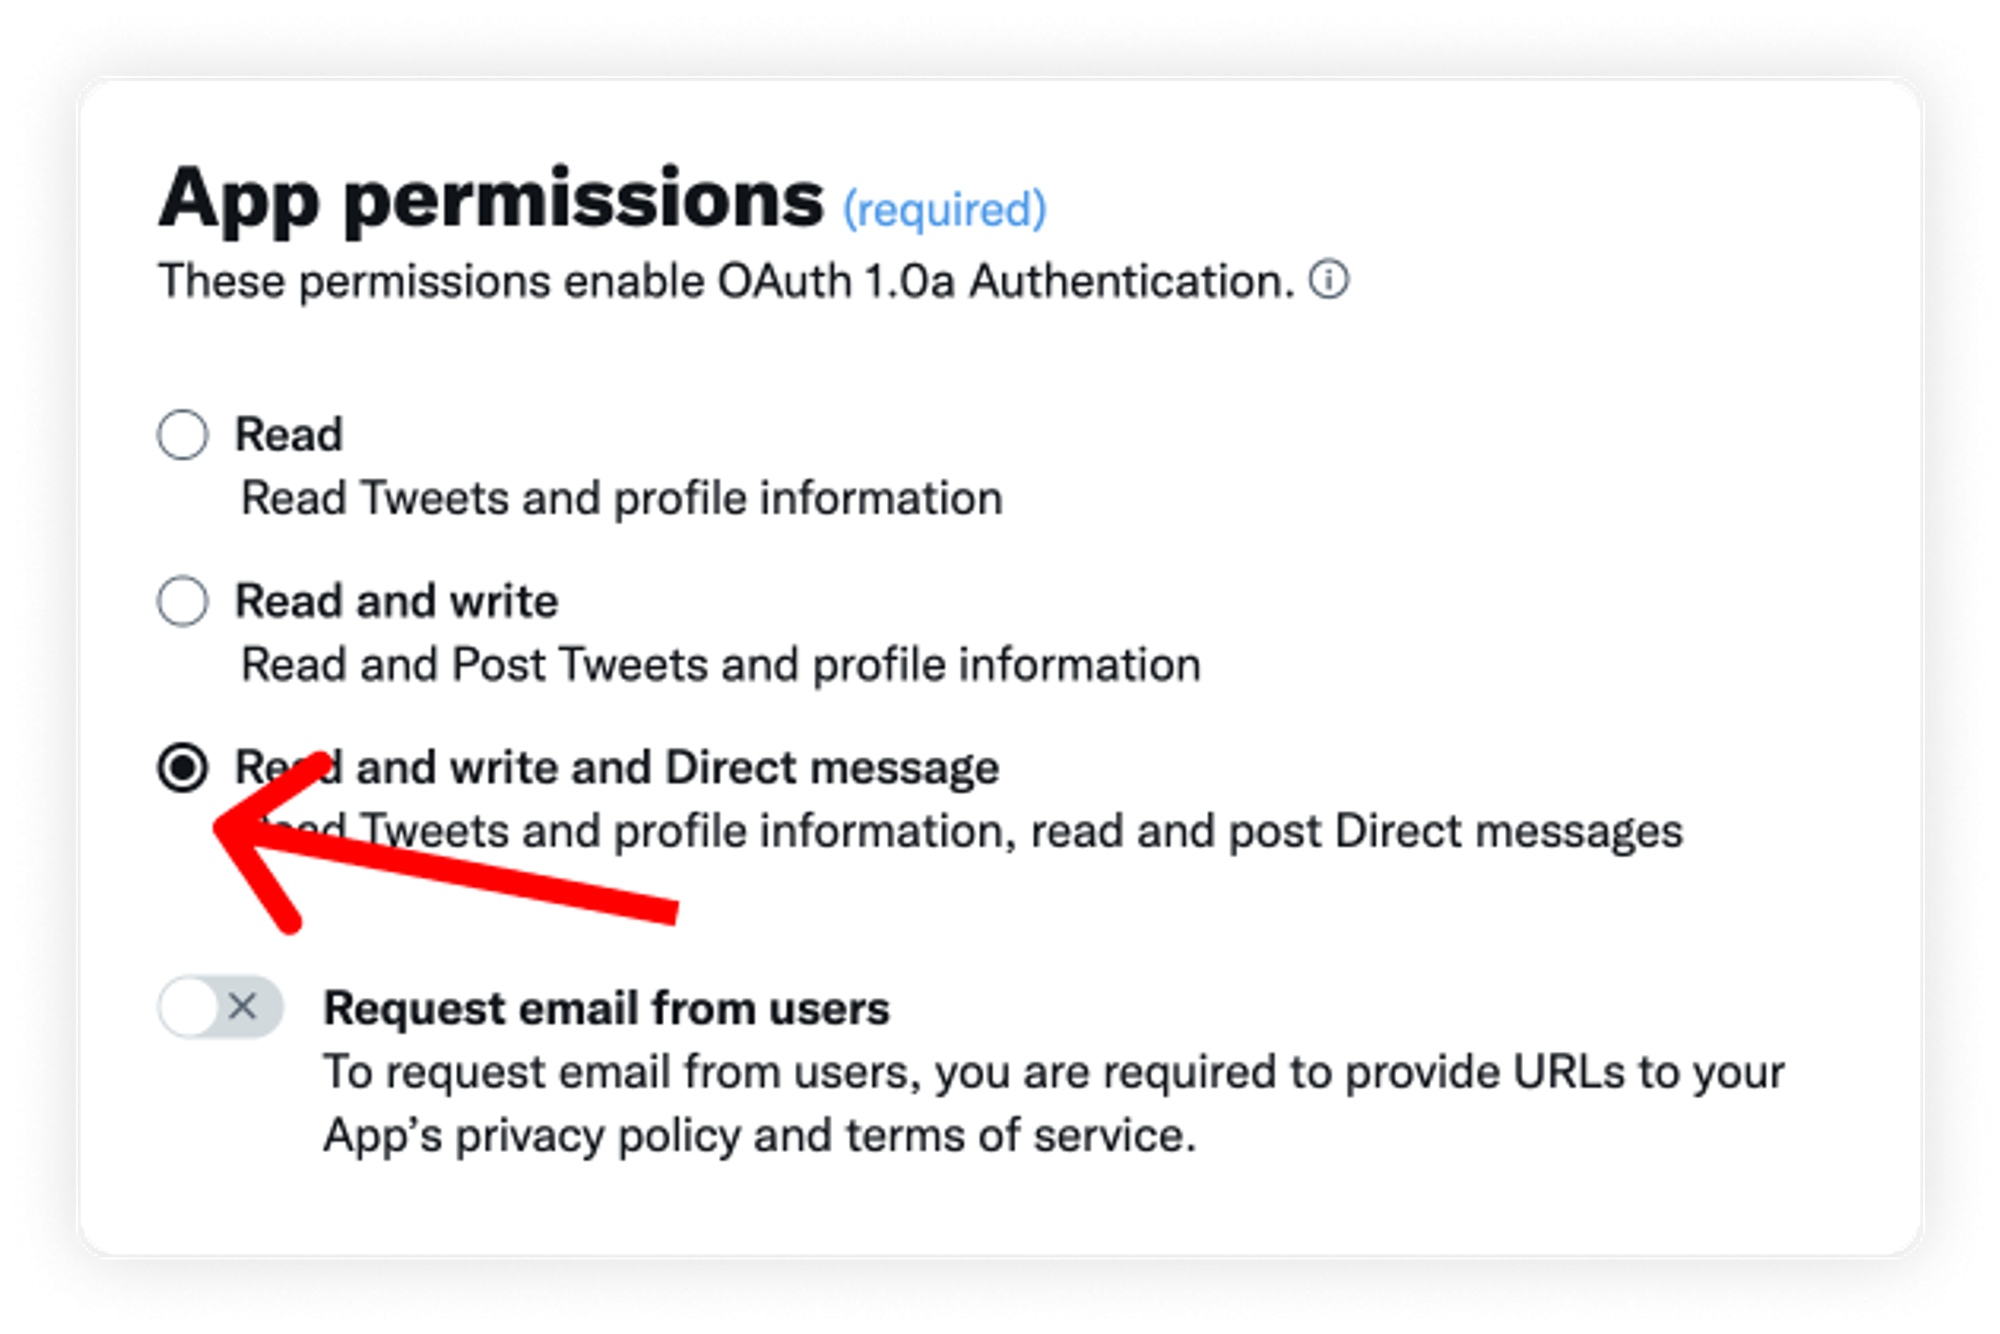
In the App permissions section, make sure you select Read and write and Direct Message. If you only select Read and write, some features of Tweet Hunter will not work (specifically: Auto-DM).
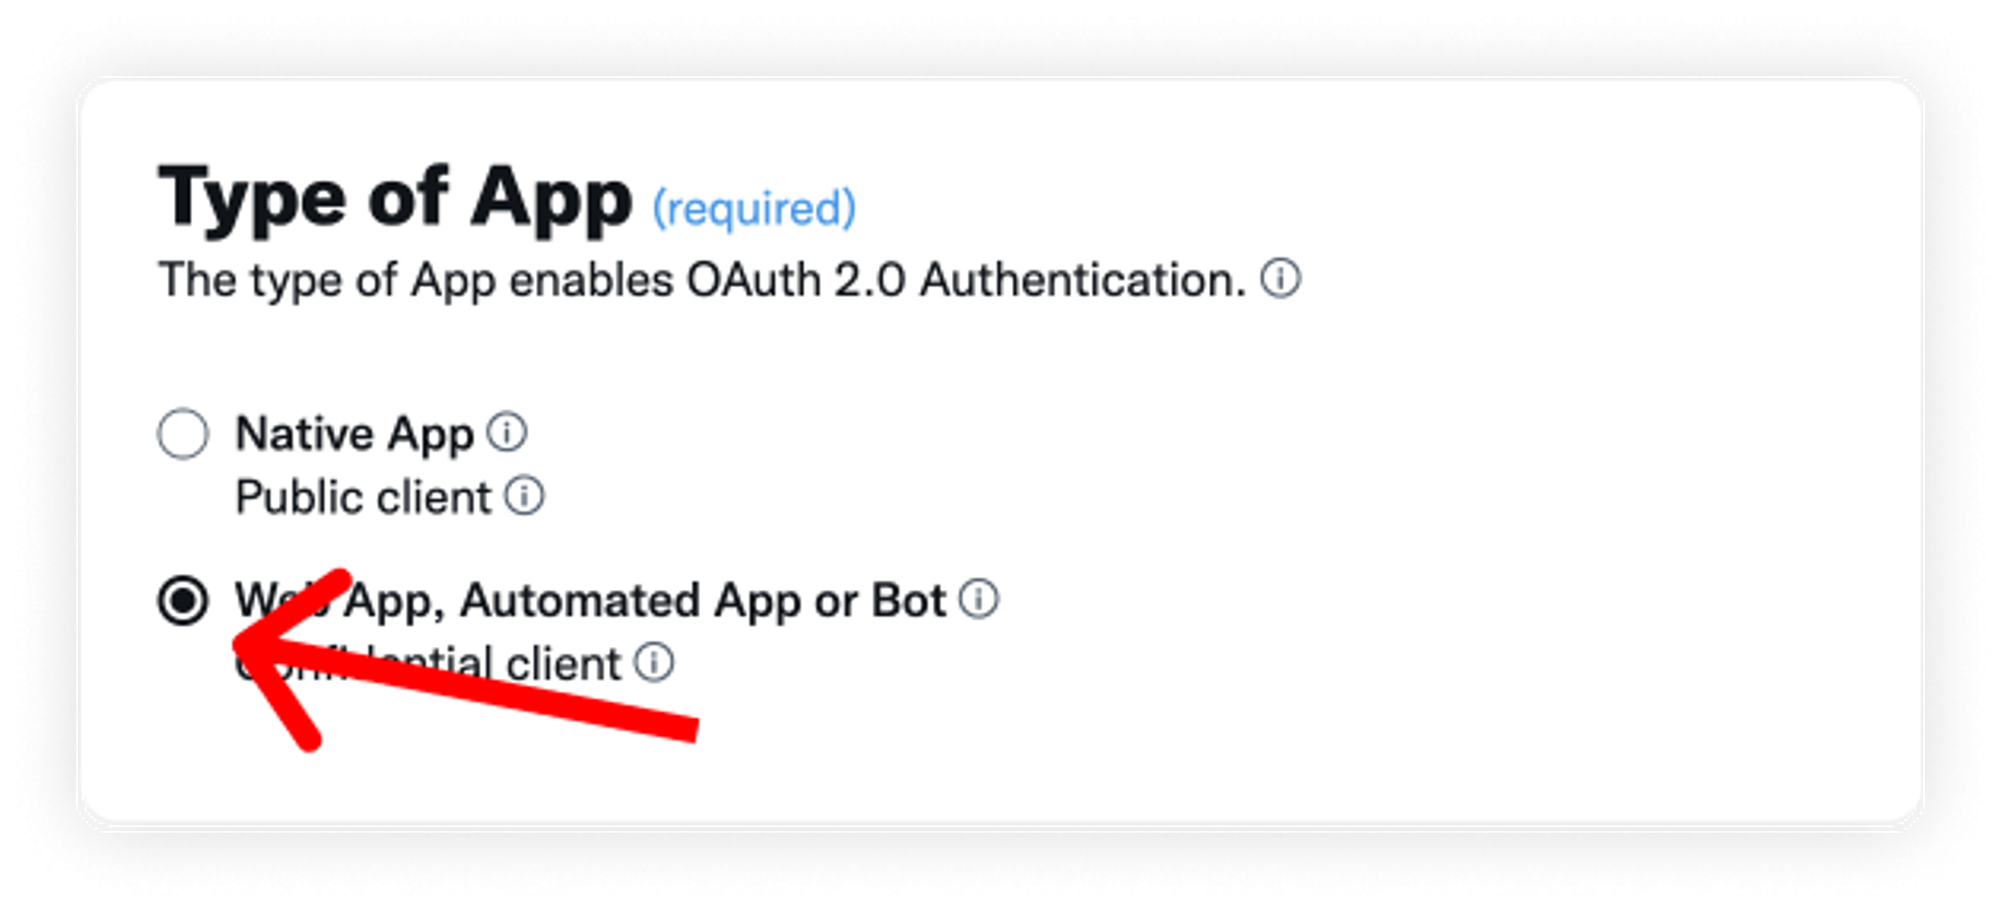
In “Type of App”, select “Web App, Automated App or Bot”.
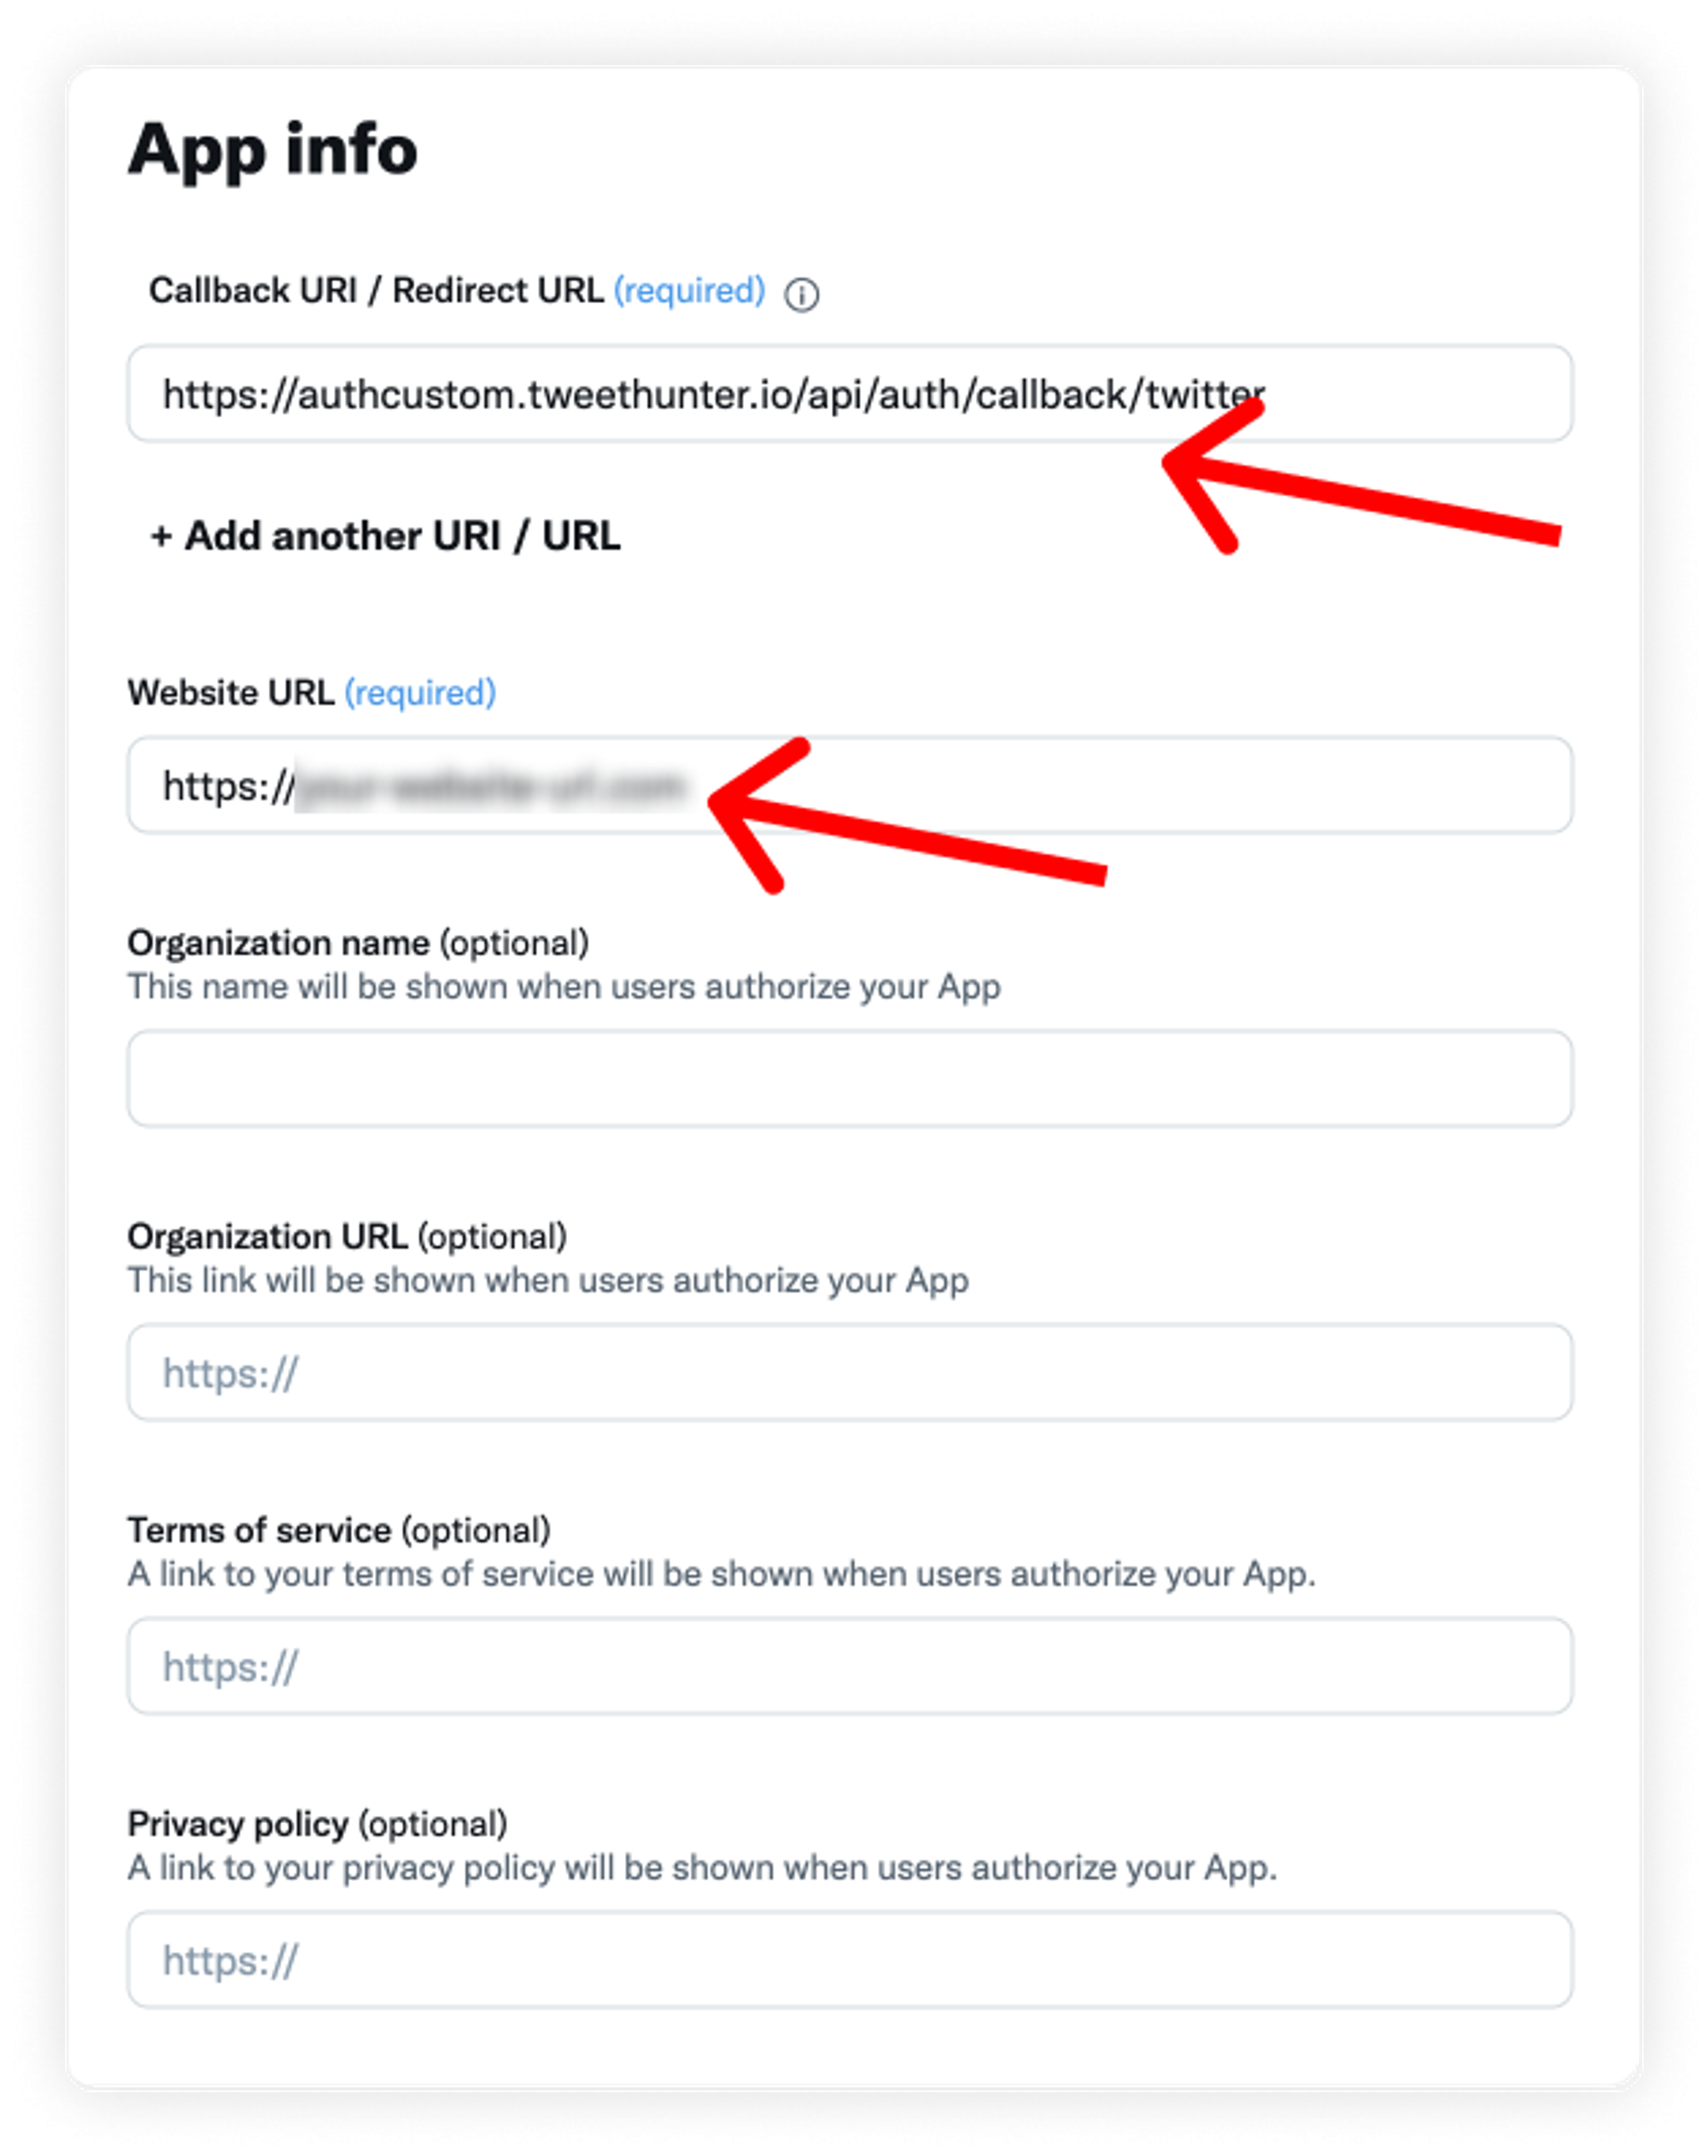
In “App info”, make sure you paste this exact URL in the “Callback URI / Redirect URL” field:
https://authcustom.tweethunter.io/api/auth/callback/twitter
This tells Twitter where it should send the data it collects, error messages, etc.
For the Website URL, you can put it your own website or a random one if you don’t own one.
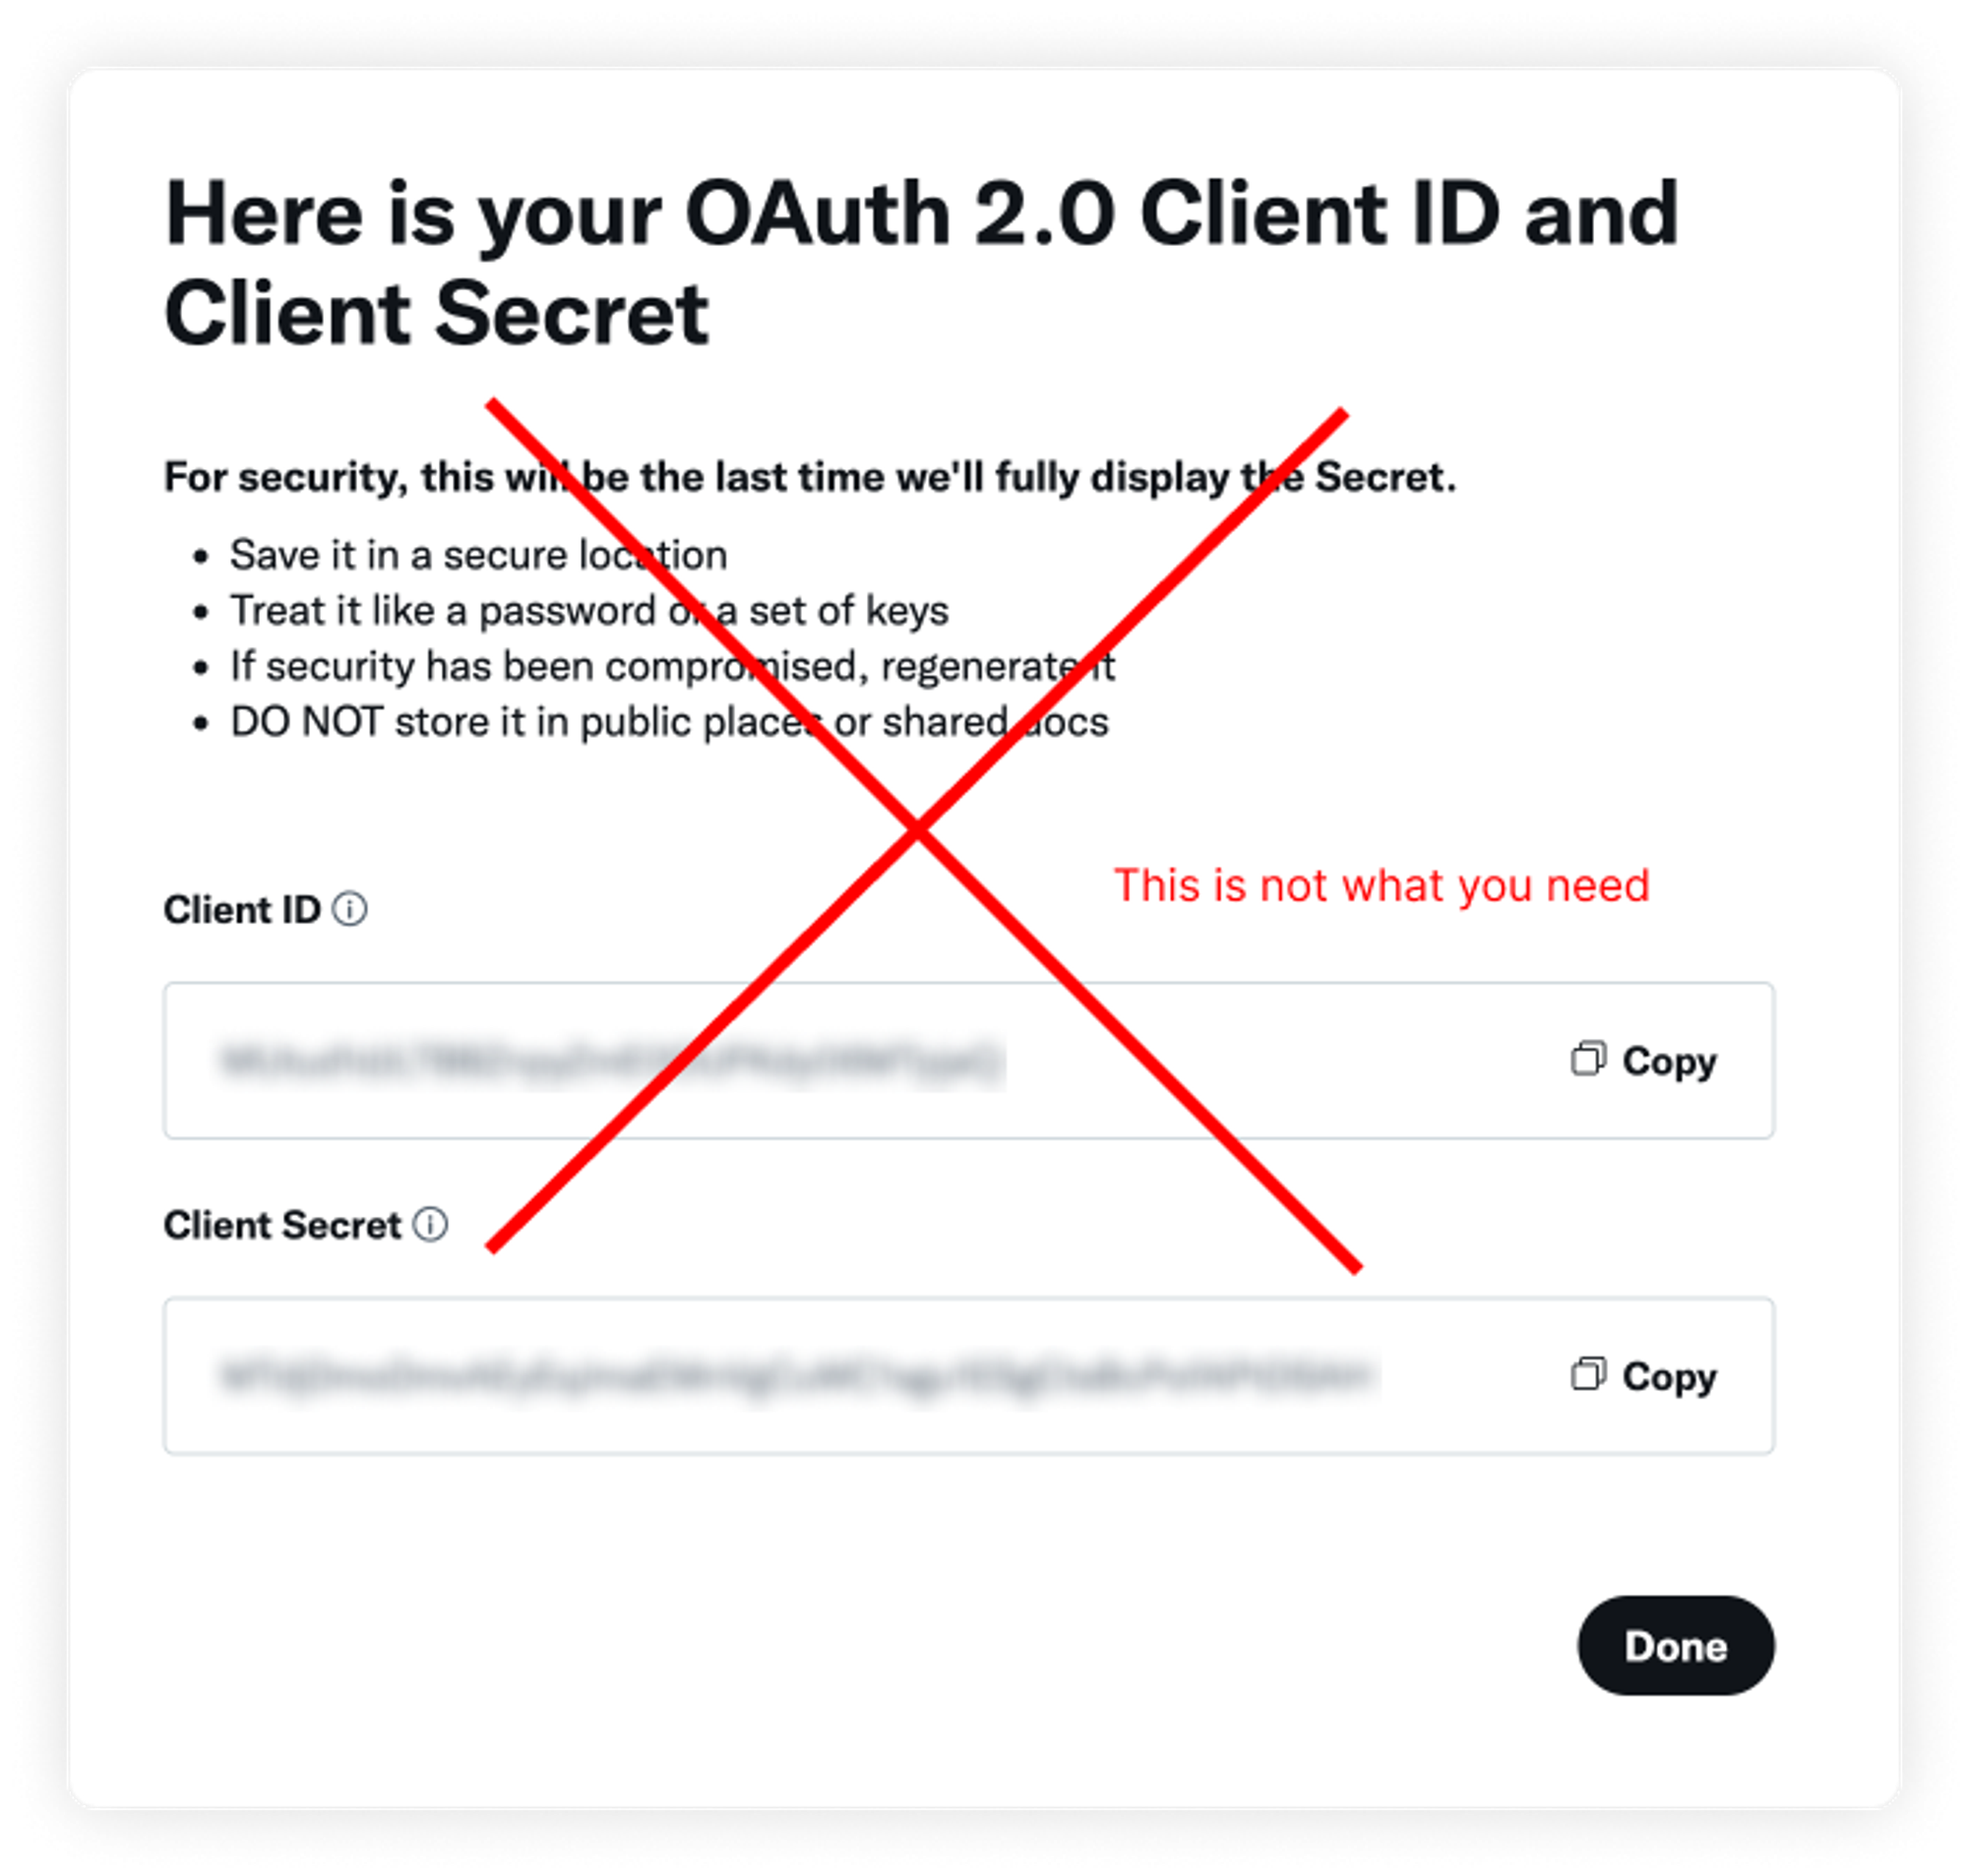
Once you confirm, you will be given your OAuth 2.0 Client ID and Client Secret. These are NOT exactly what we are looking for.
You are then redirected to your project’s homepage. From there, hit the “Keys and tokens” tab.
.png?table=block&id=1128e228-a46e-4252-a4e1-f455eb17e47d&cache=v2)
And hit the “Regenerate” button as shown below.
.png?table=block&id=53658f08-b905-49d2-80dc-79024d29b3db&cache=v2)
You will be shown your API Key and API Key Secret. Make sure you paste them in a secure place where you can find them later.
.png?table=block&id=a01f9c51-513b-45ed-a9f0-e48ccb016e73&cache=v2)
These 2 things are what you need to configure this neatly in Tweet Hunter.
3. Adding your personal Twitter app to Tweet Hunter
Your API Key and API Key Secret are the credentials Tweet Hunter needs to be able to access your personal app on your behalf.
You can simply copy/paste those credentials in the appropriate fields and hit save, whether in the popup that suggested you do so or in the Settings section.
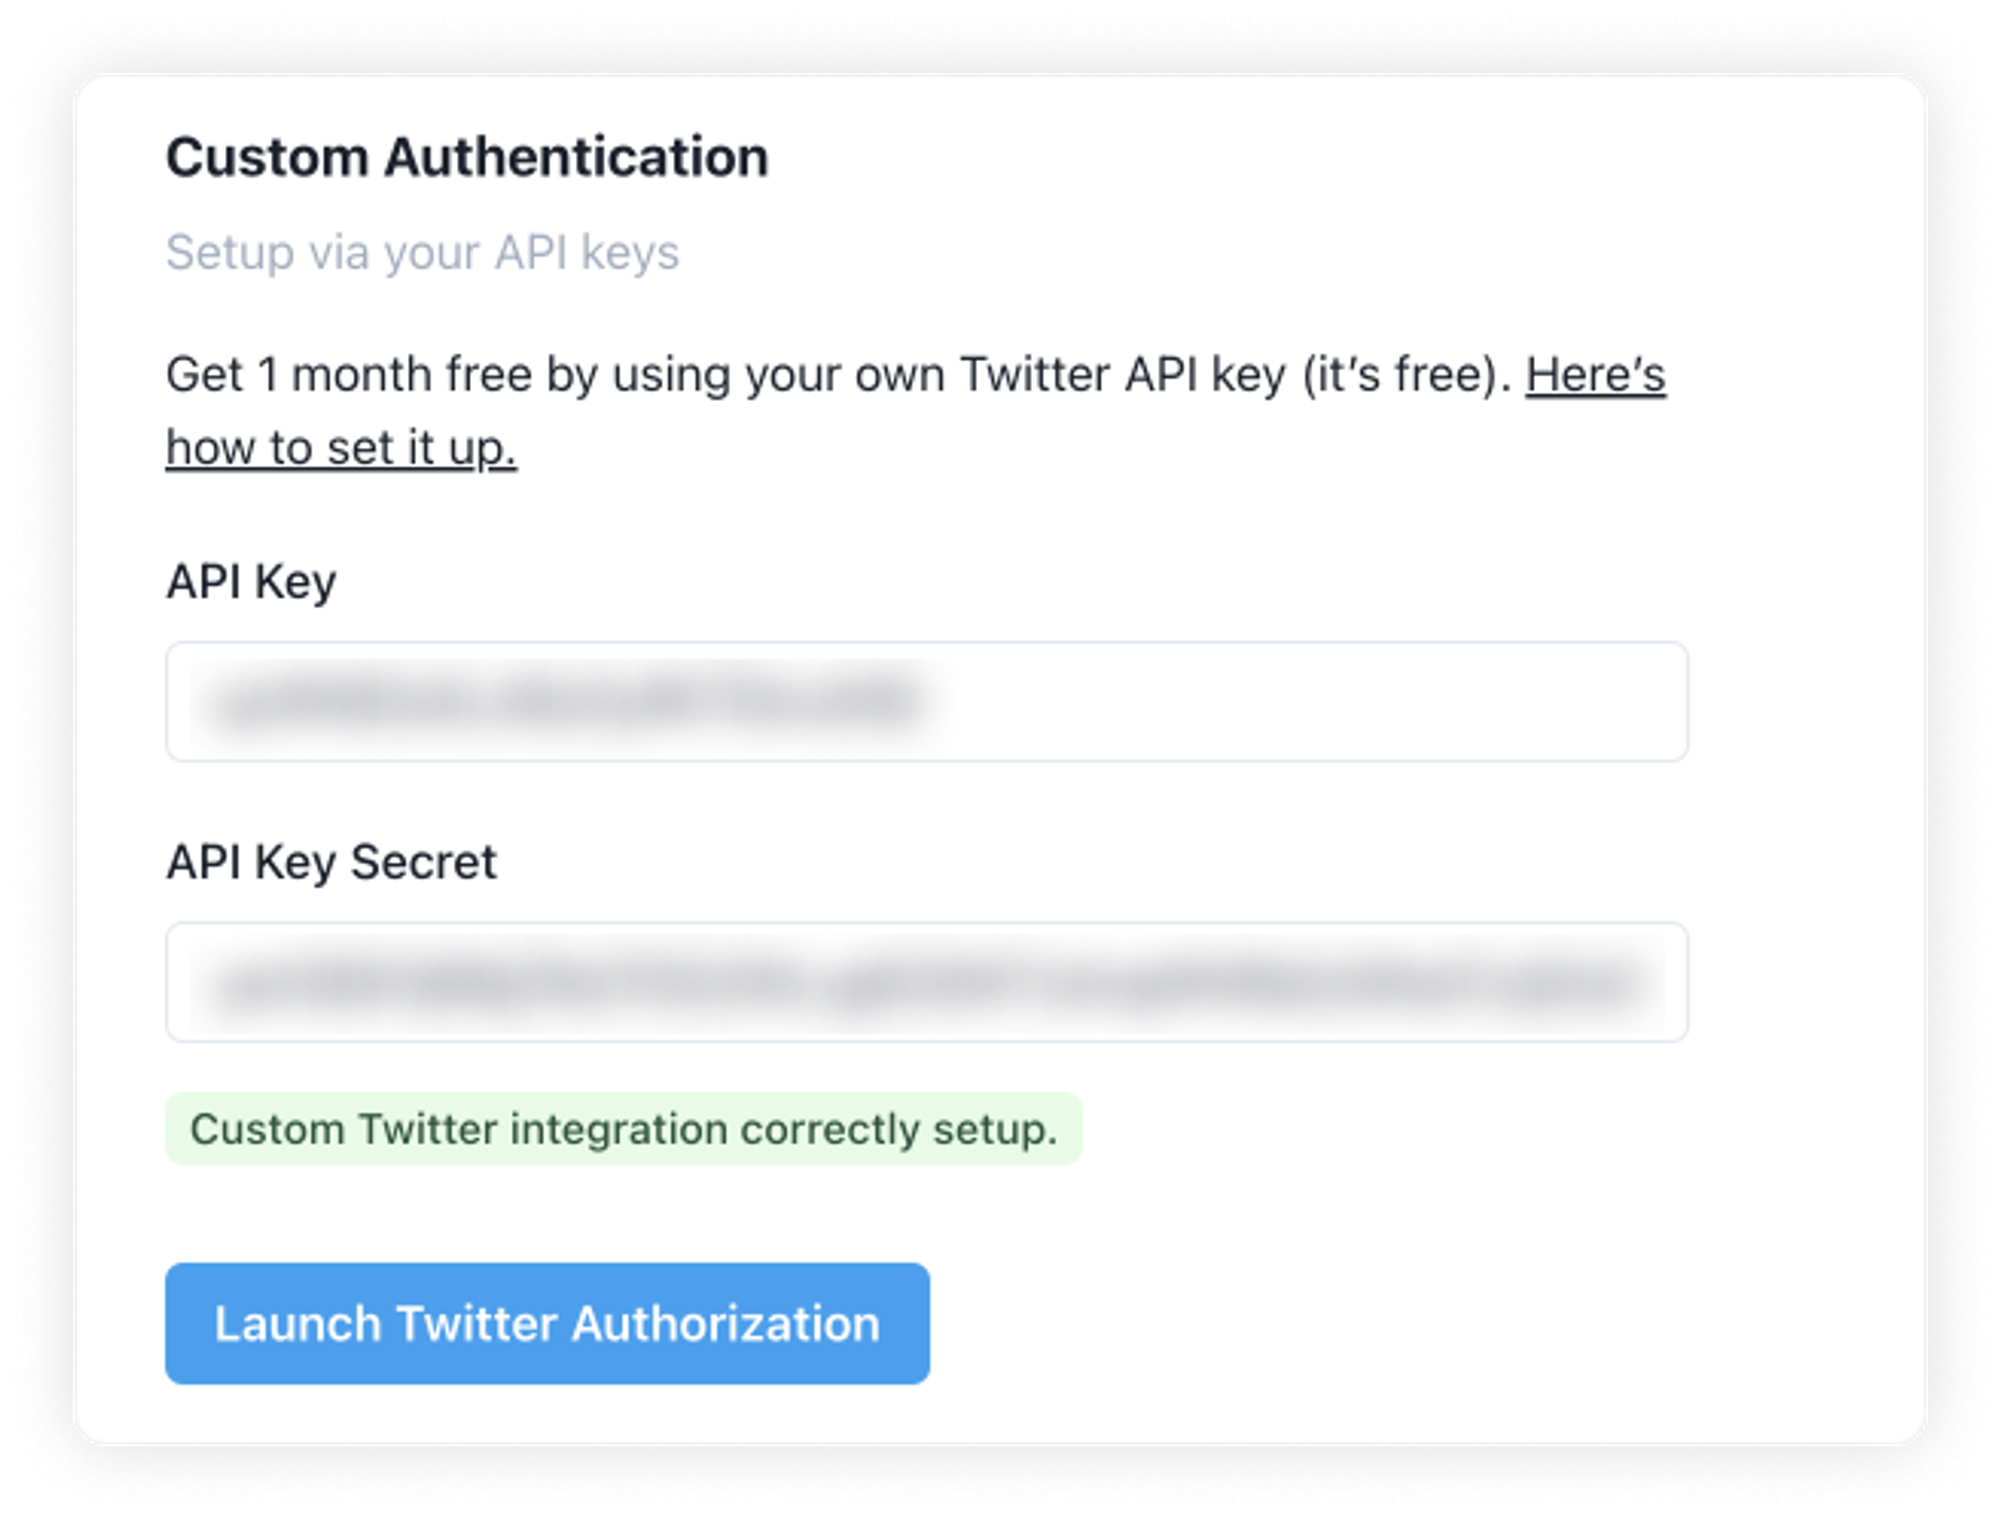
And you’re good to go! If this is your first month using Tweet Hunter and your trial is still active, you will not be charged before you reach your second month.
If you are already subscribed to Tweet Hunter as a paying customer, your balance will be adjusted and you will not get charged on your next billing cycle.